Hi everyone....
Well yesterday, Peter was out golfing, so I sat and watched some tutorials on YouTube about Gelli-Art and discovered the "Gelli plate & packaging tape" method and I must say I'm very pleased with the results I got today. The photos don't really do the end result justice, so if you fancy having a go, I can highly recommend it so that you can see for yourself....BUT....you have to have lots of patience for the drying time if you use open acrylics like I did for the base colours! Here we go.......
Using a clarity brush & the open acrylics, brush them randomly and blend them on the Clarity mat & lay the Gelli plate onto it, leaving one of the Perspex sheets on the top of it as you need to lay it down after pulling off the mat.
Pull the Gelli plate from the Clarity mat and lay Perspex-side down......then the fun starts.......
Brayer white acrylic paint onto your Clarity blending mat and dip anything you like the shape of into the wet paint...be quick though before it dries! For interest, I did the same with some gold acrylic too (did you notice I forgot to put the gold acrylic & flower stamp in the photo's?).
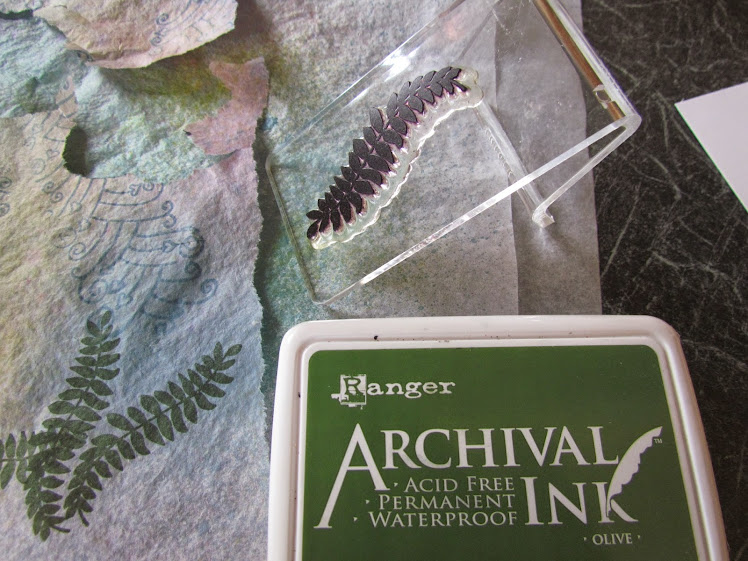
Archival ink works well on this too, once the acrylics dry, you can stamp anything onto it with no transfer of the acrylic paint, so I used Ranger Olive Archival ink for the leaves.
Lay the wide Cellotape onto the Gelli-plate and press down well so that you can remove all the paint on each strip, (this would work well with the wide or narrow Cellotape). Make sure that you use a craft mat under the Gelli-plate when you do this - don't put paper under the Gelli-plate as the ends of the tape will stick to it and you need these free to peel the tape off.
Peel off and lay sticky-side-up onto a piece of copy paper.......Bring on the Gilding Flakes and Perfect Pearls - wherever there's any sticky tape still exposed, choose where to put the Gilding Flakes and brush the remaining sticky areas with various contrasting Perfect Pearls.
Add a bit of Stampendous Fran-tage Silver Crushed Glass Glitter - make sure you press it flat though as you don't want any edges poking through the Cellotape!
I stuck the tape onto an old book page, but then decided it was wasted on there so I took it off.........
Looks much better stuck onto white card - to do this I used a glue tape runner across the card then stuck the tape to it - great borders!
Next projects will be to use these me thinks!
Have fun!!
Crafty love to all xxx
Sunday, 22 March 2015
Sunday, 1 March 2015
Claritystamp Challenge 25 - "Anything but a Card"
Well I wasn't sure what to do and had so many ideas going round in my head, so I tried to keep an open mind and went out and bought lots of "stuff" which I kept thinking "oooo - that'll be nice decorated." So now, I have lots of projects that I'll work on over the coming weeks.....
So for this month's challenge, I decided to go with a glass lantern (bought very reasonably priced in Poundland.....& guess how much it cost????).
Here's the finished item......
And here's the ingredients:
Poundland glass lantern
White tissue paper
Claritystamp "Remountable Hares" and the "Heart weave" stamps
Cornflower Blue, Black & Olive Ranger Archival ink pads
Cosmic Shimmer Vintage Ink Spray Mist - Evergreen, Purple Orchid, Arctic Blue & Clover
Tim Holtz Distress Re-Inker - Mustard Seed (small amount decanted and mixed with a tiny amount of water in a spritz bottle)
Martha Stewart (or similar) Decoupage Glue & Sealer
Large soft brush for applying the decoupage glue
Small paintbrush
Lay the tissue paper out on a sheet of plastic to protect your surface and spray the inks randomly as you like, then stamp the heart weave using the Cornflower Blue archival ink.
(You may notice that a bit of yellow has crept in - I thought this needed a bit more of the rainbow so I spritz some watered down Mustard Seed Distress Ink on the tissue paper as well).
Tear the tissue into manageable sized pieces. Coat the jar all over with the decoupage glue and allow to dry.
Pick up the jar by placing your hand in it, this helps when applying the glue so that you don't get glue all over your fingers. Paste a thin layer of glue where you want to place your first piece of tissue and gently press the tissue onto the jar with the glue brush and add a little more glue over the top to seal it. Be careful not to brush too hard - if the tissue tears, you can place another piece on top, that's the glory of decoupage, but you don't want too many layers of tissue or the glass won't be as opaque. Continue to add the torn tissue in the same way until the whole jar has been covered with the first layer.
Stamp the hares onto the tissue and tear them out close to the outline, then use a wet paintbrush to remove the excess tissue as close as you please to the hare's image.
Use the same technique for the fern leaves
Next, decide where you want your images on the jar and repeat the glue and stick technique around the jar until you have completed your little scene. Once you've finished sticking all your images on, gently paint a thin coat of glue over the whole thing to seal it and hang it up somewhere to dry completely.
So there you have it - A pretty inexpensive way of lighting the garden in the summer evenings, or a sweet gift to give.
Have fun with your Clarity stamps - the possibilities are endless....I'm thinking the "Wee Folk" would look great on these bargain jars!
Enjoy designing your "Anything's" and I look forward to seeing your creations!
Send crafty love to everyone xxx
Subscribe to:
Posts (Atom)