Thursday 1 December 2016

Clarity Challenge 46 - "Carol Singing and Christmas Joy"

Hi everyone....'Tis the season to be jolly.......and I do love this time of year.
Our theme this month sums up December for me - let's get Christmassy & joyous with the beautiful stamps & stencils from the Clarity range.
For me, the stars stencil is a great all-rounder, and one that I choose again & again because of it's versatility.  This teamed with some of the older stamps, "The Holly & The Ivy" tree and contrasting Holly & Ivy stamp, forms my design.  (Check out the new www.Claritystamp.com website as this set of stamps is on offer this month!)
Here's the finished card, followed by the ingredients & instructions to inspire you.......
Ingredients
7x7 piece of stencil card & blank base card
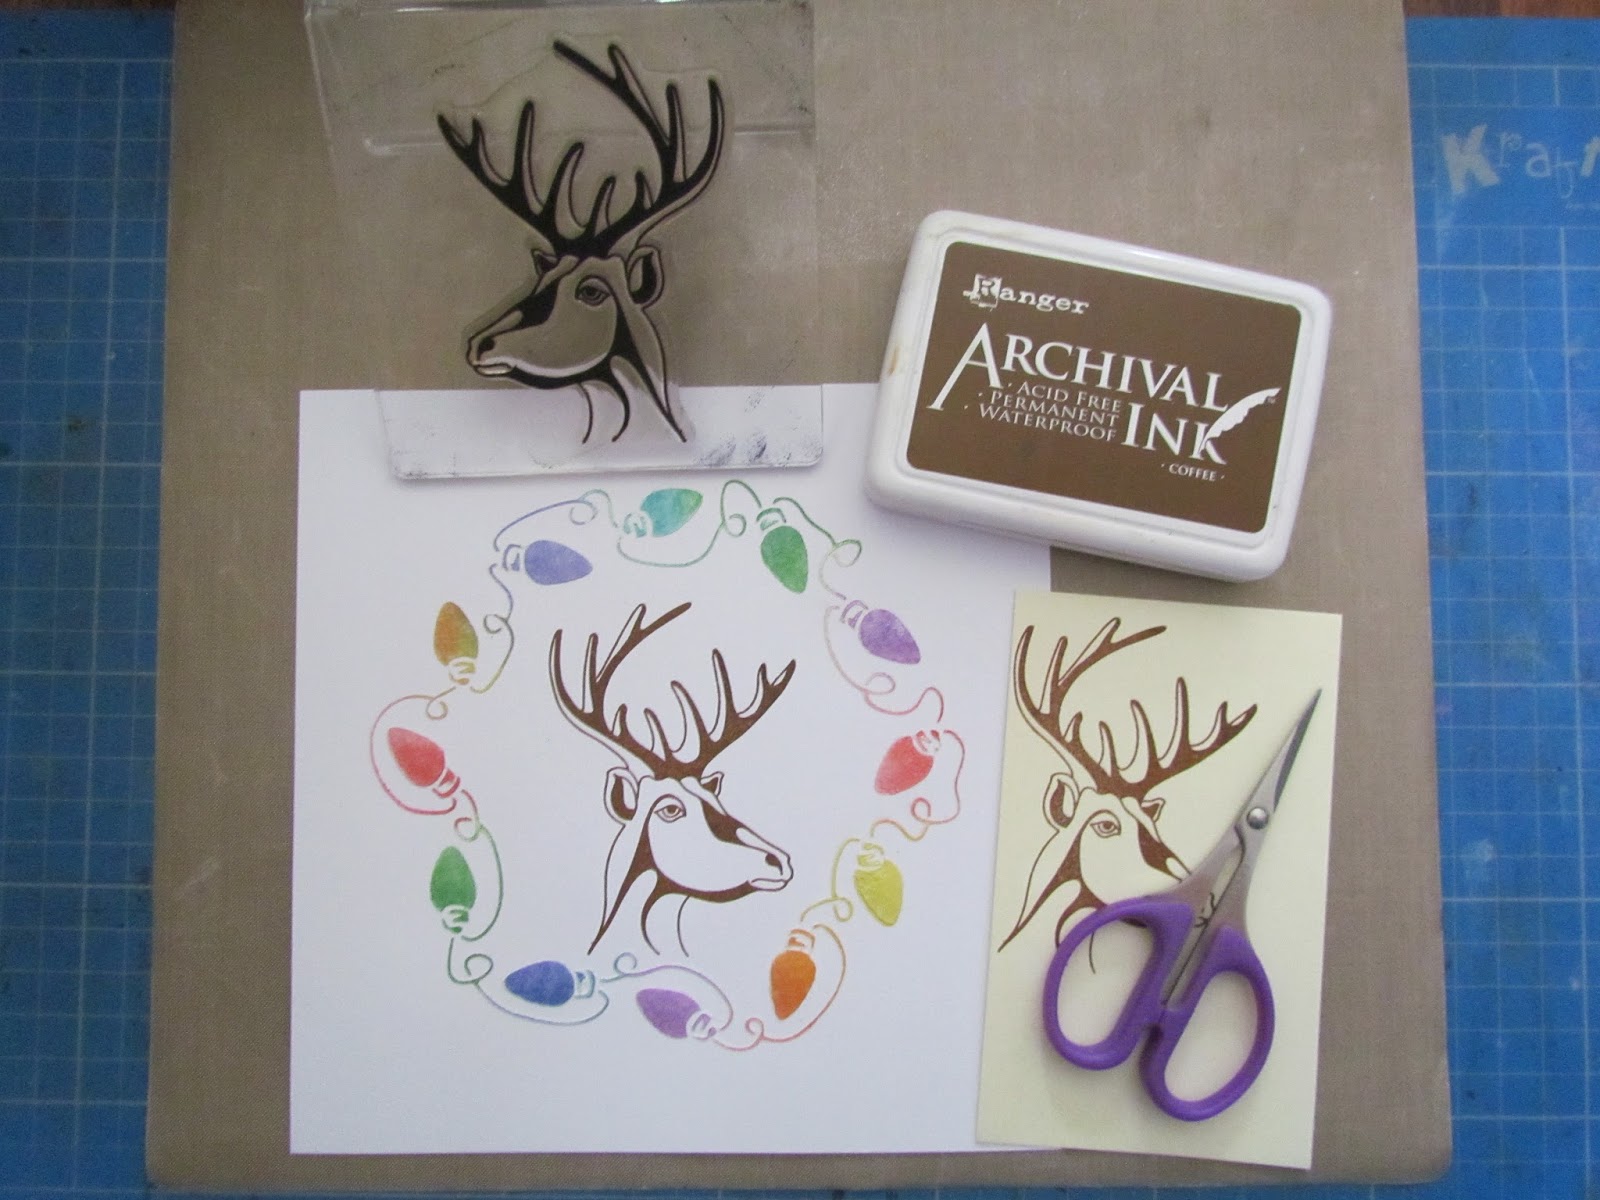
Star stencil
Stamps - "The Holly & the Ivy" tree verse, Holly & Ivy stamp
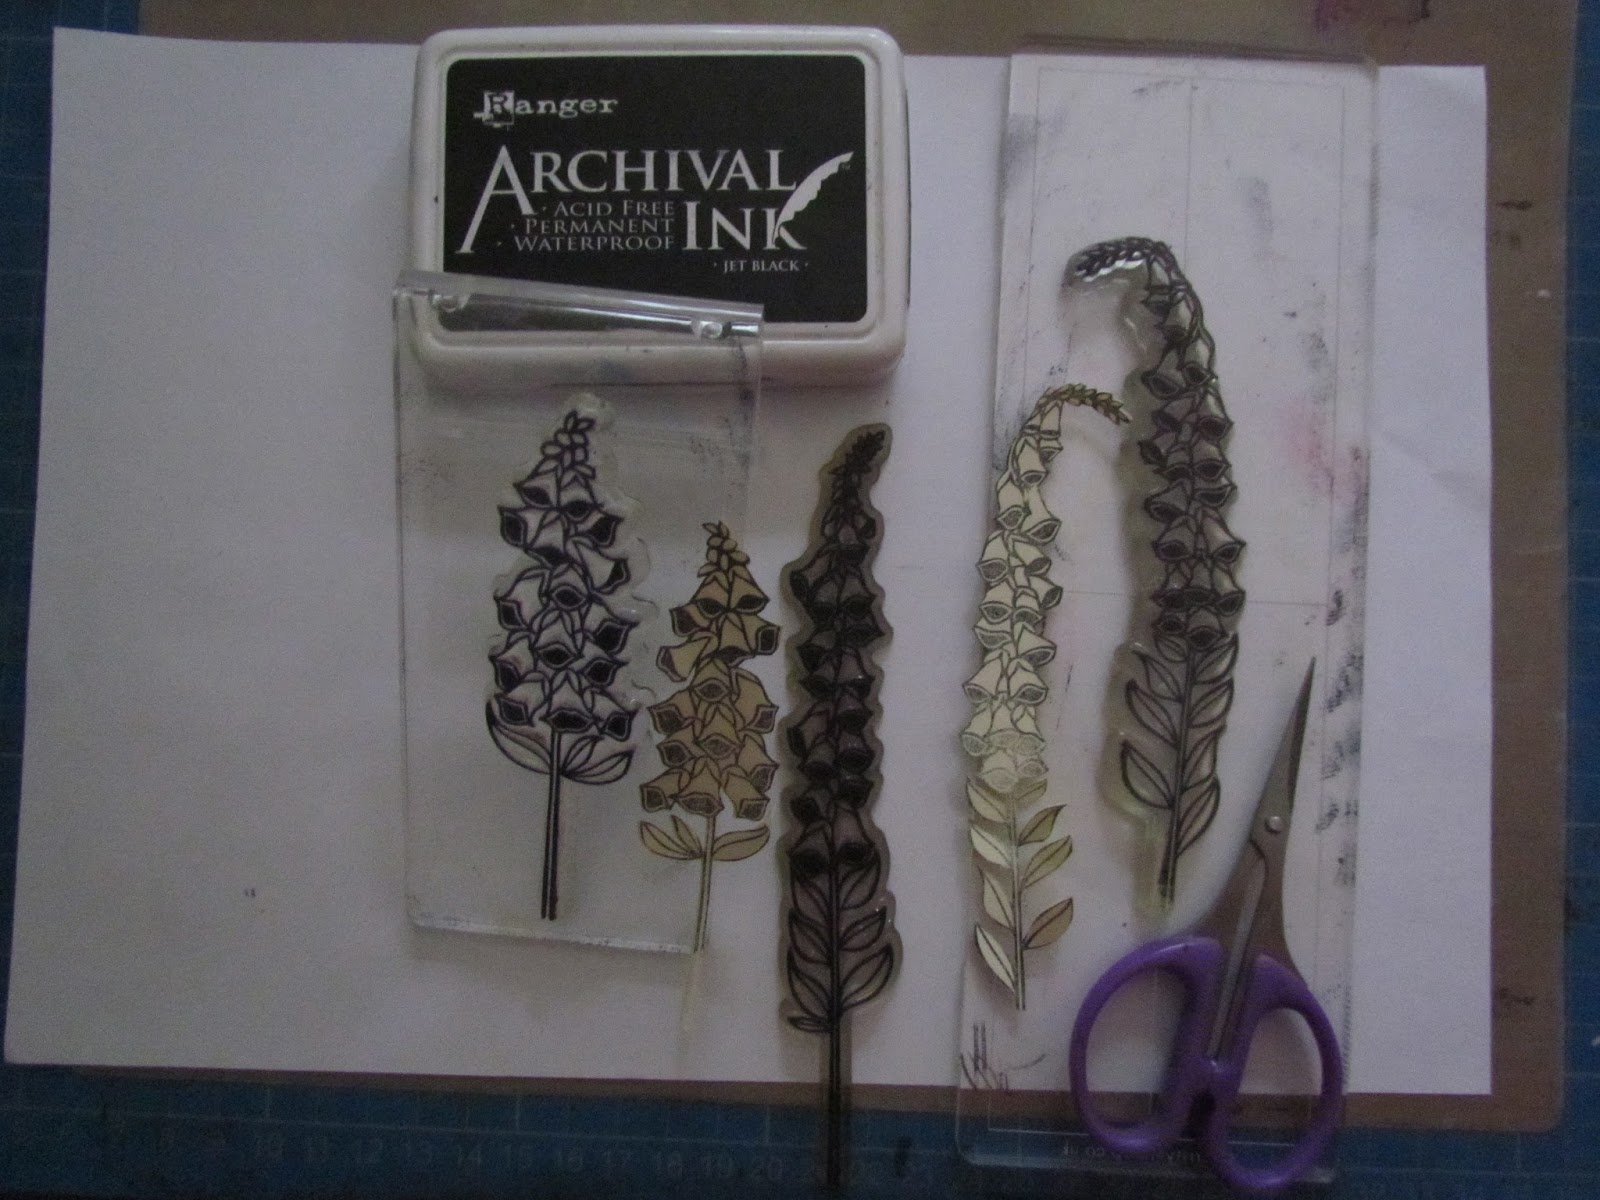
Olive Green Archival Ink
Grey & red dye based inks (Distress or Artistry)
Talc, clear embossing powder, low tack masking tape, blending tool, Clarity stencil brushes, thin paint brush, glue pen & colouring pencils
Red Promarker, Decoart Craft Twinkle Crystal Glue, Red Glitter

Place the stencil on the 7x7 piece of stencil card and tape with the masking tape.  Brush through the grey ink and sharpen the lower parts of the circles & stars by using a make-up sponge to drag the ink in off the stencil.


Once done, move the stencil very slightly up and across so that you can then ink with the red using the blending tool - this gives the illusion of shadow and is far quicker on a large design than individually adding shadow with a grey pencil.

Next, dust the work with talc and stamp the tree verse with Olive Archival ink and sprinkle with clear embossing powder.  Heat set with a hot air gun.
 Stamp the Holly & Ivy in each corner before trimming the piece
Evenly cut off a slither from each side of the stencil card so that there is a small white border showing when placed against the base card.
Once trimmed, colour the corner stamps then edge with a red Promarker.  Attach to the base card, then add the red glitter to the circles & holly berries.  Once dry, paint the stars with the glitter glue for that final bit of sparkle - I'm loving the glitter glue as the glitter stays put once dry...I can highly recommend it.
 Hope you like my card and feel inspired to maybe re-visit some of your older stamps and stencils from your Clarity stash........You may even have had a chance to grab a few of the designs in the fantastic sale last Friday?  I know I have some goodies on their way!

I see my tree is a little crooked, but hey, I think it adds to the charm of being hand-made & bespoke!?

Whilst you're making your Christmas cards, why not photograph one and join in the Clarity Challenge?  You'll be in with a chance of winning a £50 Clarity Voucher to cheer yourself up in January!  I'm sure there will be some lovely goodies at the beginning of 2017 on the new website.  Visit www.claritystamp.com to check out what's available now and start thinking about what you could spend your winnings on if you are chosen by the random selector at the end of the month!
Hope to see your artwork appear during the month.  
Have fun & I hope you have a great Christmas with friends & family xxx

Tuesday 1 November 2016

Clarity Challenge 45 - "Blast from the past"

Hi folks, hope you are all well and looking forward to the run-up to Christmas?  I have a feeling the shops must already be fed up with the whole thing by now, as their Christmassy products were on display around the end of August!
Anyway, this month's theme "Blast from the past" will be a great one as you can use any theme from previous Challenges, so the possibilities are endless!
I chose to create a piece of artwork using the "Stencil" theme from Challenge 32 back in October 2015....and of course for me, it had to be a Christmas/New Year card - I think this one would be great for either occasion sporting baubles, glitter glue & stars.

And this month, this card could be yours if you win the Clarity Challenge!.....Along with your £50 Clarity Voucher of course!!

Ingredients:
7x7 piece of Stencil Card
Stencils - Fairy Lights Wreath, Framer Shapes  Aperture, Mini Stars, Large Stars
Deer from the "Oak & Deer + Mask" and small baubles from the "Christmas Tree + Mask" Stamp sets
Grunge Paste & Spreader
Selection of bright coloured Distress & Artistry Inks for the lights, Coffee Archival Ink for the deer & mini baubles
Blending Tool, Make-up sponge & Clarity Stencil Brushes
Perfect Pearls Mist (the colour I used is "Perfect Pearl" it has a lovely shimmer)
Colouring Pencils. White Pen, Stardust Clear Sakura Gel Pen, Posca Marker Pens, contrasting Promarker
Decoart Glitter Glue & small paint brush
See links to the Clarity website below for some of the above products
Firstly tape the Fairy Lights Stencil to the Stencil Card and use the spreader to drag grunge paste through it - make sure that you have a bowl of water to wash the stencil & spreader immediately after use. 
Allow the grunge paste to dry completely, then replace the stencil so that you can add the inks with the blending tool to the lights.  The brighter the colours, the better!  (Ignore the Perfect Pearls spray in the second photo as I took the photo before I decided what I was going to do next - I used it later in the project).


Stamp the Deer in Ranger Coffee Archival on the Stencil Card and mask the stamped image.  Take one of the Framer Shape Stencils, (I chose the wiggley-edged one), use low-tack masking tape to attach it, then using a make-up sponge, lightly shade around the deer with the Artistry Wild Bilberry ink, then brush outwards from the stamp and around the edge of the stencil with the Clarity Brush to add colour to the background.  (I didn't worry too  much about the ink on the Fairy Lights as the next stage sorted that out).  Place the mini star stencil over the centre and brush randomly through it highlighting a few stars here and there.  Before removing the shaped stencil, spray the Perfect Pearls in the centre to give a nice sheen.  
Remove the deer mask & stencil and start colouring and shading the artwork.
Enhance the colours of the Fairy Lights with contrasting colouring pencils and gently underline them just under the grunge paste with a black colouring pencil - take it easy as you don't want to disturb the grunge paste. Use a white pen & Sakura Gel Pen to highlight some of the stars and the upper part of the deer's antlers.
Place the Large Star Stencil over the whole piece and lightly swirl around the edge of the artwork with the Stencil Brush with Wild Bilberry to compliment the smaller stars in the centre.

Trim down the artwork. 
Use the make-up sponge again to soften the edge of the work by using a circular movement, then use the chisel end of a blue Promarker to frame the piece.
 I mounted my work onto a blank greeting card using a glue runner, but thought the Deer needed a little something to make him a bit more festive, so I added a few of the little baubles from the Christmas Tree stamp set (launched last month on HOCHANDA).  I coloured the little baubles with Posca Marker pens, and painted those and the Fairy Lights with Decoart Glitter Glue for that little bit of extra sparkle - I've found it's easier to add the glitter glue after you have attached the artwork to the base card as it can sometimes get flattened when you run the glue runner over the back.

The glitter glue is so easy to brush on, a great effect and the glitter stays put, unlike normal glitter flitting off everywhere!
I tried to capture the glitz in this photo.....

Have fun creating something for this month's Challenge, and don't forget, not only do you get a £50 Clarity Voucher if you are randomly selected as this month's winner, but also this card as a helping hand towards your Christmas card creations.
Look forward to seeing which theme you use and all your creative work on the Challenge Blog throughout the month.....Good luck!
Take care all, Carole xxx


Sunday 2 October 2016

Clarity Challenge 44 - "Circles or Squares"

Hi Folks - lovely of you to pop by.
I'm so annoyed with myself as I'd typed my blog earlier and clicked on "publish" without clicking "save" first - and guess what.....IT DISAPPEARED.... no draft to be found anywhere! Grrrrr....me and technology don't mix too well sometimes I'm afraid.......
So, the October Challenge using Circles or Squares - I decided to use both.  The little ditty on the card was inspired by an entry in my autograph book Mum bought me many, many years ago when I was leaving my infant & junior school.  Friends, teachers  and family wrote in it and Mum's sister (Auntie Win) visited that year and wrote this in it, so Cousin Jen in Canada, this one's for you......
2 Y's u r,
2 Y's u b,
I c u r 2 Y's
4 Me!
I thought it fitted together well with the Wise Owls stamp set.........
Ingredients:
7x7 Stencil Card
Archival Black & Deep Purple
Adirondak Eggplant & Artistry Mild Blueberry
Clarity Stencil Brushes
Circle Box Frame Stencil
Wise Owls & Mask set
Spectrum Noir Colouring Pencils
Letterbox Alphabet
Black Micron Pen & White Sharpie
Blending Tool

First take a 7x7 piece of stencil card and tape the Circle Box Frame stencil in place.  Brush through Deep Purple Archival Ink (no other reason to use archival ink other than I particularly like this colour).  Mask off around the inner square and stamp the Wise Owls using Black Archival.  


Cover the stamped image with the mask (supplied with the stamps), and add a moon mask.  Brush over the two shades of blue, then remove all the masking   
Apologies for the lack of photos for the final stages, but it's quite simply colouring, stamping the spectacles & letters, outlining and shading.....
Spectacles are stamped in Black Archival, the letters in Deep Purple Archival and outlined with the Black Micron Pen. 
The centre owl was coloured using Spectrum Noir Colouring Pencils.
Shading under the owls, branch & letters were done with a dark grey colouring pencil & above them with the White Sharpie.
The square borders were outlined with the Micron pen and I drew varying sized teeny-weeney circles between the lines to fill them in.
Finally, darken the inner edge of the large square and the outer edge of the small square with one of the purple colouring pencils to give the illusion this part is set further back than the owls in the centre panel.  Use a blending tool to shade the edge of the card with purple and mount the artwork on a blank base card. 
Search through all your Clarity goodies to see what inspires you and get creating so that you can join in the fun and be in with a chance of winning a £50 Clarity Voucher. 
You have until midnight on 31st October to enter - all the rules can be found on the Challenge blog if you are unsure of what's required.
Happy crafting!
Carole x

Thursday 1 September 2016

Clarity Challenge 43 - "In the Garden"

Hi there, thank you for visiting my blog.
I love the garden - the flowers, the birds, butterflies & bees, and in a funny sort of way, all the other bugs too as they keep the garden in good shape!  My brother used to torment me as a child dangling spiders near me, and for that matter, practically any other creature he could find! 
As I love to potter in the garden, over the years I've learned that the bugs have their space, and I have mine, so we get along fine......and so do my brother & I by the way!!!
So my project is quite a simple one this time, the beautiful Foxgloves
Ingredients:
Theuva Clarity Card
Archival inks: Jet Black & Deep Purple. 
Distress inks: Picked Raspberry, Shaded Lilac & Tumbled Glass
Stamps: Foxgloves, "May Flowers" verse stamp, Dragonfly (from the "Blooming" stamp set), Post-It notes for masks, or of course use the Foxglove masks available on the Clarity website
Clarity Stencil Brushes, Moon mask
Colouring pencils of your choice, Sakura Gelly Roll pen (Stardust Clear), White Sharpie Pen

Prepare your masks if you're using Post-It notes, then stamp the Foxgloves onto Theuva card using Jet Black Archival, making sure the flower you want in the foreground is stamped first so that you can mask it off to make sure it's not over-stamped by the other flowers as you add them to your composition.  Stamp the sentiment in Deep Purple.  


Trim back your work and put the Moon Mask in place.  Use the pastel Distress Inks and Stencil Brushes to add colour to your work, lightly brushing and blending the colours across your work.  I didn't mask off the flowers as I used similar coloured Polychromos to colour them in.  Remove the Moon Mask and use your colouring pencils to add colour to the sun.
To finish the artwork, I stamped the Dragonfly in Black Archival Ink, added some shadow under the flowers and leaves, and used the White Sharpie pen above the flowers to add light from the sun. 
To add a little bit of shimmer, I used the Clear Star Gelly Roll Pen on the flower edges and Dragonfly.
Finish off by mounting on a contrasting piece of card, then onto a blank base card.
I love this sentiment as it can be used to brighten anyone's day, and for many occasions.
I hope this will inspire you to join in the fun on the Claritystamp Blog Challenge. 
There are many beautiful floral stamps, stencils & Groovi plates from Clarity that can be used for this month's theme, so put your thinking caps on and check out the other Design Team Blogs for some more inspiration.
I look forward to seeing all the entries during September.
Have a lovely day and thanks again for visiting me xxx


http://www.claritystamp.co.uk/Ink/Archival-Ink-Pads
http://www.claritystamp.co.uk/Ink/Distress-Ink-Pads

http://www.claritystamp.co.uk/Clear-Stamps/Floral/12688-/Foxgloves---Unmounted-Clear-Stamp-Set
http://www.claritystamp.co.uk/Information/Search/14414-/May-Flowers-Verse---Unmounted-Clear-Stamp
http://www.claritystamp.co.uk/Information/Search/17351-/Blooming---Unmounted-Clear-Stamp-Set
http://www.claritystamp.co.uk/Stencils/13450-/Clarity-Stencil-Brushes-Set-Of-4
http://www.claritystamp.co.uk/Accessories/Clarity-Masks/13561-/Moons-MASK
http://www.claritystamp.co.uk/Accessories/Pens-and-Pencils/9431-/Sakura-Gelly-Roll-Pen-Stardust-CLEAR-700

Monday 1 August 2016

Clarity Challenge 42 - "Fussy Cutting"

Hi there, thanks for visiting my blog to have a little look-see at my Fussy Cutting artwork for this month's Clarity Challenge.
I'm loving the Yupo paper and can't stop playing with the alcohol inks - it's quite fascinating to watch the inks react on it and every piece turns out so different.  If you haven't invested, I think it's a must-have in any craft room!
So on to my project.......A peaceful blue lagoon.
For my artwork I used the following:
Yupo Paper
Alcohol inks & Blending Solution
Felt Blending Tool
Archival Inks - Jet Black, Red Geranium, Cobalt & Olive
Tropical Fish & smaller fish from the Harbour Scene Stamp Set
Large Fern from the Entwined Cats Set, branch from the Journaling stamp set & the Bubbles Stamp
Alphabet Word Chains Un-mounted Set
(See links below to the Claritystamp website for the above products)
Start by creating a watery background on Yupo paper using a selection of green & blue alcohol inks.  I found the best way is to drip the lighter colours onto the paper first, then use a couple of drops of blending solution on a clean felt pad to dab & mix the colours as a base. I then gradually dripped more ink in each colour around the edges and dabbed lightly with a clean felt pad to mix the colours.  I wanted a more watery look to the middle to create an aperture, so I dragged the felt pad with the blending solution lightly a few times in one direction across the centre.
The glory of this paper is that you can keep going and going - it will never give up creating new blends as you add to it!  Wish I'd known about it long ago, so thank you to Barbara for the introduction to this on her blog!
Once you're happy with your underwater background, start stamping the seaweed. (Be careful not to slide on the smooth paper). 
Colours I used - Olive for the branch, Red Geranium for the fern & Cobalt for the bubbles, the letters were stamped in Jet Black.
All the fish were stamped in Black Archival on different coloured pieces of scrap Yupo paper, orange & yellow inks for the large fish and the smaller fish and word on a contrasting blue/green piece.
Once the Archival ink is dry (takes a while), cut out the fish & word and arrange them to create your tropical lagoon.  They can be stuck with a glue runner or a ballpoint-tip glue pen, either works well on this surface. 
So that's it.......Ahhhh......very peaceful.
I think I'll look in the charity shops to find a suitable frame as I may well add this piece to the gallery in our bathroom - a lovely scene to look at whilst relaxing in a nice bubble bath.
Hope you get inspiration from this, and all the other lovely Design Team ladies blogs. 
It would be lovely if you found time to join in the fun this month and share your artwork with us, and other fellow crafters on the Challenge Blog.
I look forward to seeing your projects over the coming weeks.  You've got until 31st August to create something "fussy cut" from your Clarity stash. 
Everyone's welcome to enter, so why not have a go?
Have a lovely day, Carole xxx
http://www.claritystamp.co.uk/Mounts-and-Card/20476-/Alcohol-Ink-Yupo-Paper---White---10-sheets
http://www.claritystamp.co.uk/Ink/Adirondack-Alcohol-Inks
http://www.claritystamp.co.uk/Ink/Adirondack-Alcohol-Inks/12941-/Alcohol-Blending-Solution-UK-amp-EU-only
http://www.claritystamp.co.uk/Ink/Archival-Ink-Pads
http://www.claritystamp.co.uk/Information/Search/18489-/Tropical-Fish-amp-Coral---Unmounted-Clear-Stamp-Set
http://www.claritystamp.co.uk/Clear-Stamps/Miscellaneous-and-Travel/18563-/Large-Harbour-Scene---Unmounted-Clear-Stamp-Set
http://www.claritystamp.co.uk/Information/Search/20202-/Entwined-Cats---Unmounted-Clear-Stamp-Set
http://www.claritystamp.co.uk/Information/Search/5123-/Bubbles---Unmounted-Clear-Stamp
http://www.claritystamp.co.uk/Information/Search/15301-/Journaling---Unmounted-Clear-Stamp-Set
http://www.claritystamp.co.uk/Information/Search/19990-/Alphabet-Word-Chains---Unmounted-Clear-Stamp-Set

Friday 1 July 2016

Clarity Challenge 41 - "A Day Out"

Hi there.......So here we are, 1st July already and not much sign of summer to give you inspiration to plan a crafty creation depicting "A Day Out"!?!.....
(No wet & washed out artwork now please, although it would reflect our summer perfectly so far!)
Looking through all my Clarity stamps, I came across the Circus set which I've only used a couple of times, so I thought it would be perfect for this month's theme and make a great card for a child.  I'm often stuck for ideas for the little ones, so here we go with "Circus, Circus"......

Ingredients:
Piece of A5 Theuva Card & a blank base card
Black Archival ink & an ink pad of your choice for the Big Top (I used a variegated pad)
Circus un-mounted stamp set (good value for money as there's 10 individual stamps in this set!)
Wee folk stamp (sets 1 & 2) together with the Labrador from the "Thank You" set
Children playing from the Meadow Dance & Deerscape stamp set
Mowed Lawn Distress ink, Re-inker, Blending Tool & fine paint brush
Cloud mask, Stonewashed Adirondack ink & Clarity stencil brush
Colouring Pencils, a clear Spectrum Noir Sparkle Pen, black Promarker & a Sharpie pen
(See relevant links below to the Claritystamp website)

So firstly gather together your stamps and ink pads for the basis of your card and lay them out on a piece of Theuva Card to get the correct perspective. Next, cut masks for the ring master, Big Top and dog on the podium.  Stamp the ring master and podium dog in place, then mask them to stamp the Big Top in the distance. 
Stamp the children at play in front of the Big Top (I masked off the grass along the bottom of the stamp as I didn't want the black line underneath).  Once they're in place mask off the tent as well, and stamp your "Circus Circus" in the sky using Black Archival Ink.  (Don't worry about masking the words after you've stamped them as the light blue is easily covered with Polychromo colouring pencils).
 

Using a blending tool and a torn piece of copy paper, add some grass using Mowed Lawn Distress ink, making it a little darker for shadow under all the stamped images.  Place the cloud mask and use your stencil brush to add Stonewashed ink just above it, randomly moving the mask up across your artwork and repeating the process until you have light fluffy clouds in the sky.  Remove all the masks and have fun colouring in your artwork.  I added some blades of grass by using a very thin paint brush and some Mowed Lawn ink 
Trim your work, draw in a little fence, outline the Big Top and draw a flag on top, all using a thin Sharpie pen.  Using a black Promarker & ruler, draw a line round the edge of your artwork to frame it. 
Mount on a contrasting coloured piece of card, then onto your blank greeting card.
Thanks for visiting my blog today, and I hope that you will have time to join in with us this month.  I look forward to seeing your creations throughout July, and who knows, you may even win yourself a £50 Clarity Voucher for sharing your Clarity creation!  
A random selector is used to draw the winning entry, so all levels of experience are in with a chance.
Check out the other Design Team blogs for more inspiration and good luck to you. 
I hope to see you back again soon......Fingers crossed for a bit of sunshine this month! xxx

Saturday 18 June 2016

"Life is never going to be long enough"

Hi there
I thought I would try to share some more projects on my blog.  I don't always take photos, then when I've finished my artwork, I wished I had!
I had a feeling that this may come out ok, so I decided to take a few minutes while crafting to take some pics.
I watched some tutorials on YouTube for Tim Holtz's Distress Crayons which I'd bought a while ago when they first came out - I hadn't done much with them apart from try them on scrap!
After watching on YouTube, it seemed that I needed some Gesso which I'd seen mentioned many a time on blogs, but in amongst my crafty stuff, this was something I'd never invested in....Order placed!
So the Gesso arrived and I thought I'd have a go to see what I could create.......
Ingredients:
7x7 Clarity Stencil Card
Pebeo white Gesso & palette knife
Tim Holtz Distress Crayons, paint brush & water
Glass Blue & Chalk PaperArtsy Acrylics & Spreader
Olive Green & Black Archival Inks
Boy & Birds Stamp
"Life is never going to be long enough" Clarity NDC Stamp
Clarity Town & Dotty Wave Stencils
White Sharpie Pen & Blue Promarker
First I had a messy session spreading Gesso on several pieces of Clarity Stencil card with a palette knife - left it uneven to add texture then left them to dry. 
I scribbled patches of colour over the dried Gesso and brushed on some water to blend the colours - I may have gone over the top using all the Brights crayon set, but I wanted to try the whole lot.
Next the stamps, Boy & Birds and sentiment stamped in Black Archival - these need to be pressed firmly as the Gesso was quite uneven.  
Using the edge of the blending mat, tear a piece of copy paper and with  Green Archival, sponge a hill in place.
Squeeze a blob of acrylic and dab in the spreader to pick up some of the paint, randomly placing lines on the artwork in each colour (thanks to Sam Crowe for this little tip). 
 
The bottom left corner looked a bit bare, so I used the Town Stencil to add a bit of interest with black archival & a make-up sponge.  Around the edges & middle, I dabbed a small amount of Chalk Acrylic paint through the Dotty Wave Stencil with a blending tool.
I used a white Sharpie pen for highlighting and then edged the piece with a blue Promarker before mounting on an 8x8 blank greeting card.....finished!

Hope you like it and I look forward to seeing you back again soon xxx


Wednesday 15 June 2016

Clarity Challenge 40 - Masculine (Mid-month Blog)

Hi there - well they say June is set to be the wettest in years, so no excuse not to stay in, keep dry, and CRAFT!
Here's my mid-month Masculine themed card to hopefully inspire and encourage you to join in the fun.......
Ingredients
7 x 4 ins piece of watercolour canvas (or for a different texture use watercolour paper)
8 x 6 ins blank greeting card & contrasting card to frame the artwork
Oriental Lattice Stencil
Clarity Stencil Brush
Paperartsy Acrylics - Zesty Zing, Beach Hut, Inky Pool
Pebeo Patinating Wax - Empire Gold
Ranger Black Archival Ink
Tropical Fish & Coral stamp set
Small fish from the Harbour Scene stamp set
Spectrum Noir Aqua Pens - Kingfisher, Bud Green, Sunflower & Meadow
Spectrum Noir Sparkle Pen - Aquamarine
Used lolly stick
Gathered Twigs & Peacock Feathers Distress Ink
White Pen & Fine Black Sharpie Pen
Short length of garden twine & a brad
Start by sweeping the Paperartsy Acrylics randomly across the piece of canvas - small amounts at a time to give a watery effect.  I used my fingers for this - lovely & messy!
Next place the stencil where you want it and tape it down to the canvas.  Using the stencil brush and a small amount of paint at a time, brush through the Inky Pool acrylic paint sweeping it lightly round the outer edges.  I then used a light touch of dark blue Distress Crayon to add definition in small areas, worked in with my finger and did the same with the wax to give a luminescence.
Stamp the fish in Archival Ink, wait for the ink to dry fully before colouring in with the Spectrum Noir Aqua pens.  I also highlighted parts of the fish with a Spectrum Noir Sparkle Pen
 
Snap the ends off the lolly stick and use the middle piece for your sign.  Wipe it onto the Distress Ink pad for a variegated colouring to the wood.  Once dry, write "Gone Fishing" with the white pen.
Tie a knot in each end of the twine and glue onto the sign.  Once the glue has dried, make a small hole in the canvas with a sharp point and use the brad to attach the sign in the corner.
After assembling the card, when I was drawing on the bubbles with the black sharpie, I scribbled on what I thought was the scrap paper underneath to check the pen, but it was the edge of the main card!
Doh! 
All was not lost - I guillotined the edge off the card and using Peacock Feathers Distress ink, used the fish stamp and added his tail down the inside edge of the card.  Works ok I think......?
Hope you like it and don't forget you have until the 30th June if you haven't already entered the competition to showcase your artwork and win yourself a £50 Claritystamp voucher.
If you're stuck for ideas, check out the other Design Team artwork for some inspiration.
Good luck xxx